
Figma to Wix Plugin | Step-by-Step Guide | 4 Easy Steps
It’s finally here! 🥳 Wix Studio finally launched its official Figma to Wix plugin which is super powerful!
Designing the web in Figma and redesigning the same thing in Web Builder doesn’t make sense. But now we have a solution with Wix Studio.
Wix Studio launches its powerful Figma to Wix Plugin that magically converts Figma design to fully functional websites without any code, Wix Studio gives you AI superpowers to manage and sync design elements, automate tasks and more!
You can create quick wireframes, generate style guides, and export your designs to working websites in minutes. Plus, using Wix Studio, you get access to powerful AI features to generate responsive designs and create content fast!
This tool is completely free and you get access to beautiful pre-designed layouts and website designs to start your next project.
Seamless Export
You can easily export your style guide, elements, wireframes and hi0fi designs to a Wx studio website without planning or organising your project too much using Figma to Wix Plugin. This website is completely responsive and editable.
Large Collection of animations and effects
You can quickly add interactive elements and animations to your websites with pre-built animation and effect presets – parallax effect scrolling animations, mouse effects and more!
Next Level AI Features
Save hours of your time with AI features like image generators AI content creation, make your site responsive with 1 click, built-in AI code code editor and generator, and even improve your SEO.
Load of features for teams, freelancers, and design professionals
Wix has built hundreds of features keeping designers, developers, teams and enterprises in mind. Everything from collaboration to business tools is taken care of.
Figma to Wix Plugin guide
We will guide you in turning your design in Figma into Wix studio with new Figma to Wix Plugin.
Wix new plugin is super efficient and you can import and export your design smoothly and streamline your design process so you can focus more on your design than spending time redesigning on Wix.
Let’s dive in.
Installing the Wix Studio Plugin
To begin with, the process involves working simultaneously with Figma and Wix Studio.
On Figma
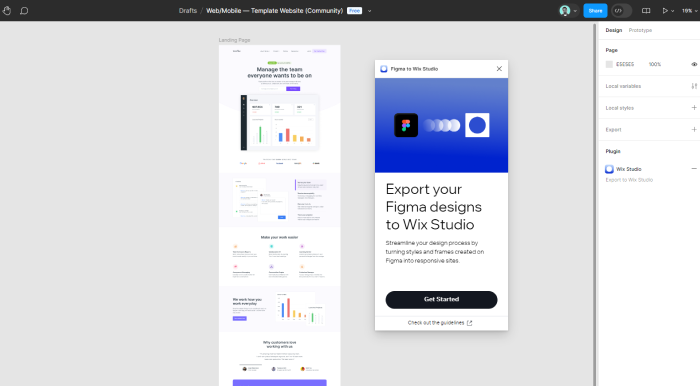
Go to the Figma Community page, or you can directly go from the plugin panel (or Shift + I) by right-clicking on the Figma design file and searching “Figma to Wix Plugin”.
After installing the plugin you will see the panel with instructions. Click on the “Get Started” button, Next, copy the link of the Figma file that you want to export in Wix Studio. You can use the shortcut Cmd/Ctrl + L on the Figma desktop app to copy the link to the clipboard and then go to the Wix Studio.
Connecting Figma files to Studio
On Wix Studio
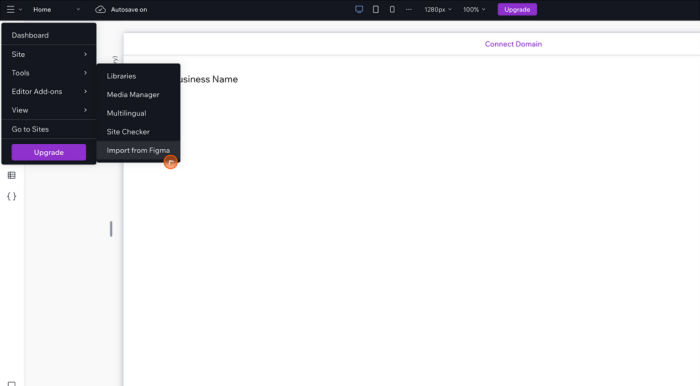
Open a blank canvas or an existing site where you want to import your design in the Wix editor. Reveal the site menu by hovering over the studio logo at the top bar and opening the drop-down menu, Select tools>import from Figma.
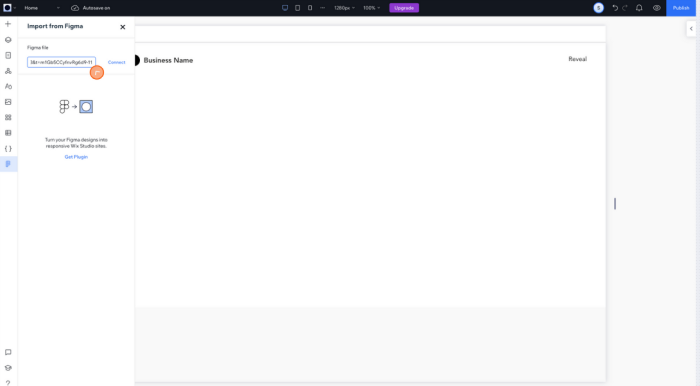
Paste the Figma file link into the placeholder for import from the Figma panel in the studio and hit connect. Completing the connection will take a while followed by a one-off authorisation process. Now your Figma file is connected to Wix Studion you can import frames and styles.
Precaution while exporting styles in Figma
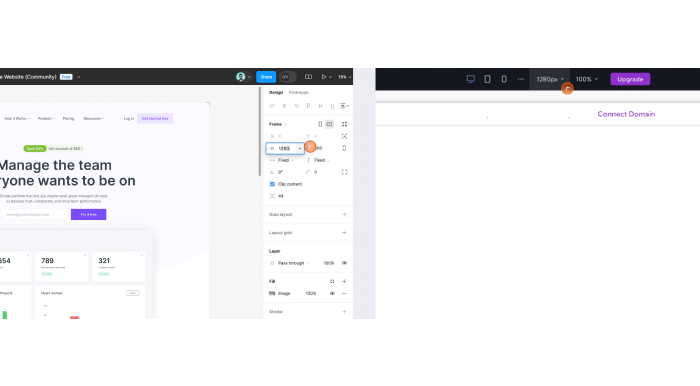
Tip: To achieve good results. You need to adjust the size in of editing size in Wix Studio same as the Figma frame width. If you don’t do that Wix Studio will scale up or down your design.
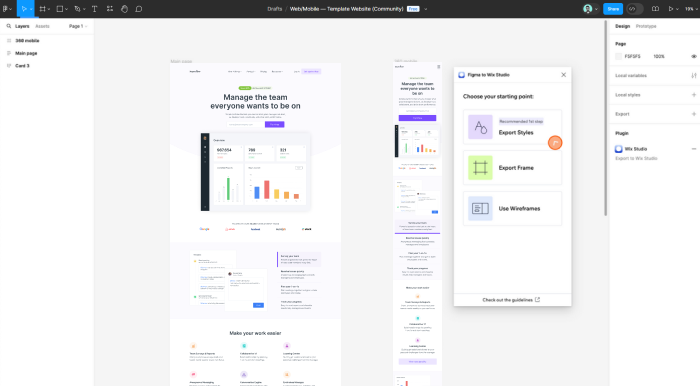
While choosing to start porting, you will see 3 options on the panel.
1 Export Style: This step is recommended for the first step. First, you should export typography and colours so that you will maintain a high level of consistency. If you don’t follow this pipeline the design follows the default styles and may affect your design and layout.
2 Export Frame: If you choose not to export style first then you have to manually style each element in the studio.
3 Get Wireframes: If you prefer to go with scratch, you export 100+ components, including wireframes which are also optimised in the studio.
How to export styles
On Figma
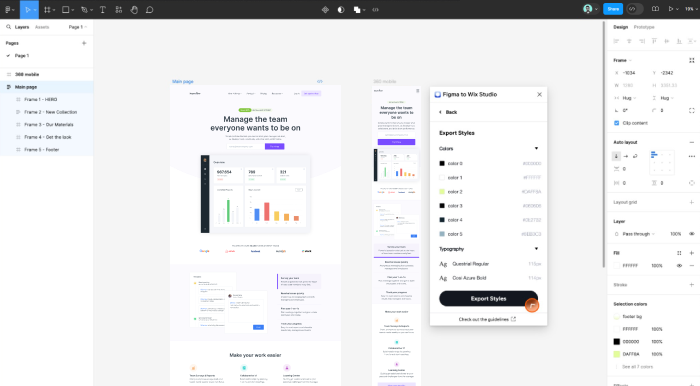
1: Select frames that contain all the styles you want to export for your website or app design. This can consist of one or multiple frames.
2: You will see typography and colours are automatically detected by the plugin, in the panel, including text elements and their styles, like font, colour, size and formatting along with colours that are present in text, buttons, shapes and backgrounds, in the selected area.
3: Review, before exporting syles, once you are satisfied you can click on the export style button. You will get notified when the export is completed.
Importing styles on studio
On Studio
In the import Figma panel, the styles will appear. You can apply styles by clicking on apply styles to the site. Once Applied, In the theme panel, you can find all of your themes under Typography and Colors.
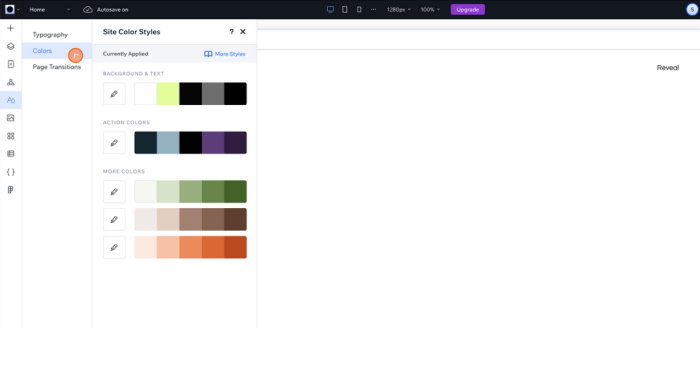
Note: You will get notified.If any of the fonts is missing, and you can import it easily from there. If you don’t import the missing font it will be replaced by default font.
Exporting Frames:
On Figma
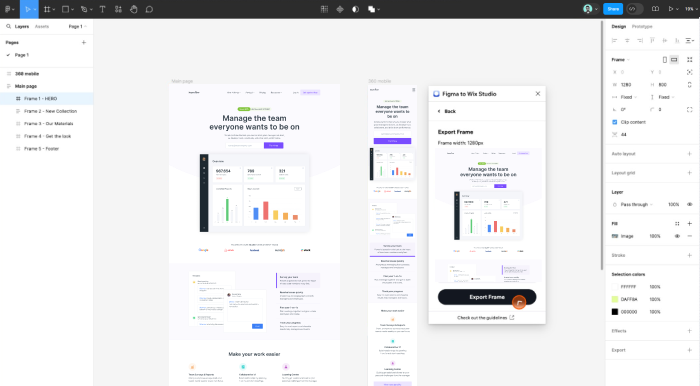
Go back to Figma and select the “Export Frame” from starting point panel.
Select the frame you want to export in the studio. The selected frame width will be shown in the panel.
The design of frames will determine how they will imported into the studio.
- Page: top-level frames only
- Section: nested frames wider than 1001px
- Container: all frame sizes
- Stack: available for frames with auto layout
Once you are ready you can click on Export Frame, and go to the studio to import
Tip: When exporting frames you can keep the horizontally or vertically positioned elements together by adding auto layout to selected frames or components. Once they are imported into Wix Studion they will be shown as Stack – a flexbox container.
On Studio
In the import from Figma Panel on the studio, the exported frame will appear.
Select a frame from the panel and click Add frame as, to the available option in the dropdown menu. These options depend on which frame format you choose.
- Add as a Section: Add the imported frame as a section in the studio viewport
- Add as a Page: Create a new page
- Add as a Container: Add a frame in the middle of a selected element
Note: Only top-level frames turned into pages in the studio
To add a frame to the site click Add to Site and a notification will let you know when the frame is added successfully.
You can keep adding frames until the complete Figma design is transferred to the studio.
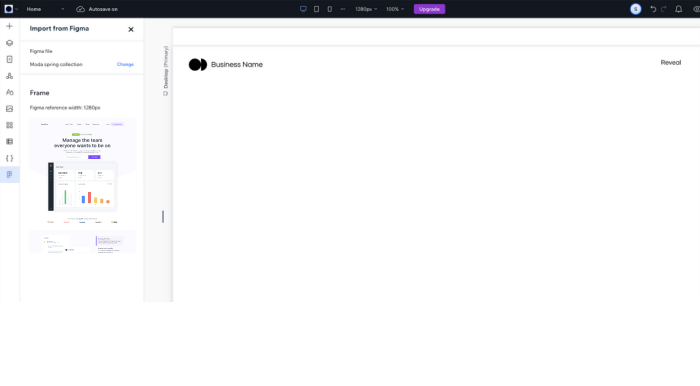
Note: A few elements such as menus and forms don’t import as desired, and will need to be redesigned using studio components. You can add or remove elements directly in Studio Editor, no need to redesign in Figma and export.
Tips for getting the best results for your elements
To ensure smooth export you should know which element plugin support for export.
The Plugin automatically identifies the following elements:
- Page
- Section
- Stack
- Container
- Images
- Button
- Text
- GIF
- SVG
File Size: Each file should be up to 250kb
Exporting Images
While you export a frame from Figma, the studio recognises the shapes you have used whether they are vector groups or icons. Only SVG’s with up to 250kb or smaller are supported.
Additionally, Images are added to the site’s Media Manager for future use.
Exporting Vectore or shapes (SVGs)
While you export a frame from Figma, the studio recognises the images used and extracts them but if there are masked images it will appear as the masked shape in the studio and you can unmask it.
Additionally, Images are added to the site’s Media Manager for future use.
Building section on Figma
When you export top-level frames on Figma and import them as pages, sections are automatically created based on the spacing in your design.
To ensure smooth section creation you need to format them correctly and set them as children of the top-level frame. The layer needs to follow the visual order from top to bottom.
Background
Wix supports colour, gradient and image backgrounds for section only. How they are saved in the studio:
1: Gradient will save under my colour gradient in the colour picker panel.
2: Background Image will appear in Media Manager.
Note: For the background image, you need to export a full-width image or frame.
Containers
A container is a layout tool in the studio. In Figma, you need to auto-layout multiple elements in a frame, so they will appear as containers in the studio.
Working on your Studio site
Now you import all of your design to Wix Studio. It is time to fine tune details before you publish your site.
- Adjust the responsiveness of your design.
- Add movement and tailor to your exact specs with no-code animations and effects
- Connect native business solutions like eCommerce, bookings and more
- Add dynamic content using CMS.
- Optimize your site with SEO.
If you have trouble building your site on Wix or designing your web on Figma contact us we will help you build.Get to know more about us and hire us to get unlimited designs.
